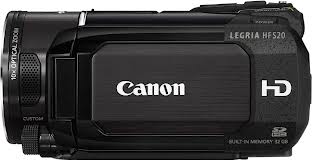
I’ve been using my current camera (Canon Legria HFS20) for a number of years and it has been a great choice for the type of footage that I need to capture. When deciding on a camera I wanted to pick one with a built in hard drive to make file storage and transfer quicker and easier when importing to my computer.

The Legria HFS20 records to the built in Hard Drive in AVCHD format. AVCHD stands for Advanced Video Coding High Definition and is used widely in High Definition Consumer Camcorders. The format has been used for several years now after first being introduced by Sony.
Choosing the right file format...
When it comes to file formats, questions are often asked about the many options available to edit and export and in particular the difference between AVCHD and MP4. They both use the same codec when recording media – H.264 - but they differ in the way they structure the media and data contents.
When importing footage from my camera I use a USB connection and depending on the footage I will either import straight to iMovie or Final Cut Pro. When importing to iMovie (Currently using version 9 – a newer version is available however) I connect and then import, selecting to ‘Optimise’ the footage to a slightly compressed file resulting in a much smaller file size and slightly reduced quality. The resulting files are then imported onto my computer as .MOV files which is an Apple file format. I use this option to save space when storing media on my External Hard Drives – there is a small loss in quality but for highlights and analysis use it is still a good option for review.
When importing the footage direct into Final Cut Pro X the files are transferred straight as AVCHD files and I can then edit straight away in that native format. With the AVCHD format you will need to import the footage with an editing program such as Final Cut Pro, Adobe Premier, etc as not all video playing software will not be able to play the raw AVCHD files on their own without firstly converting them.

If you are recording .MP4 files you can connect and either copy the files over or view straight from the camera using video playing software on your computer. MP4 is the better option for sharing video files to sites such as YouTube, Vimeo, etc. For example, after editing the native AVCHD files in Final Cut you then need to export the video into a suitable format for sharing. Most editing software will have Pre-Sets for exporting files to make the process easier depending on whether you are exporting to handheld devices or online.
As a general overview AVCHD is generally used to capture & import the footage from your camera whilst MP4 is more widely used, and compatible, for sharing as a single exported file – for example uploading to the Coach Logic website! Some cameras are capable of recording both AVCHD and MP4 simultaneously to the Hard Drive and an SD Card which can be a good option to compare and see which works best for you in terms of quality and ease of use when importing/exporting.
I have also had a look online and found a good video for explaining the different codec’s and formats available. It explains more about the file structures and the ease of use of some formats over others and is well worth a look;
Choosing the right recording mode...
When it comes to my own camera settings, the Canon has many options available but for basic recording I keep it fairly simple. It has several recording modes with varying quality levels. I generally have mine set to High Quality at either 17 or 12 Mbps – recording time will of course vary depending on the option. The imported file size will also vary – if you don’t have lots of storage space or you are using a slower computer then a lower Bit Rate is recommended for smaller file sizes.
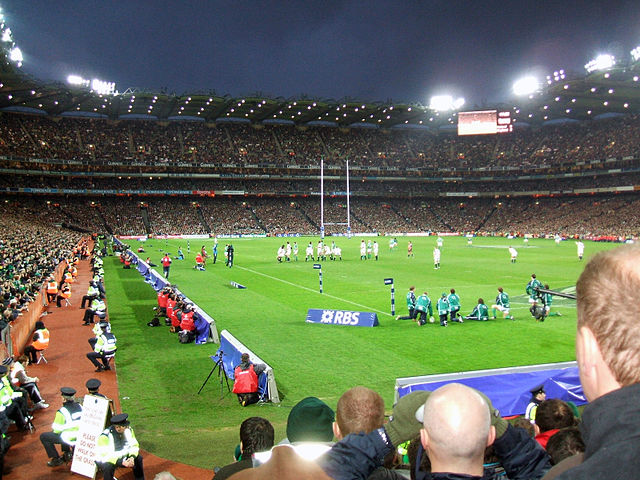
I have found when I’m filming rugby under floodlights that the ‘Sport’ Pre-set is a good option to increase the shutter speed. Quite often I have filmed at small grounds with poor lighting so this helps with the picture quality.

My camera also has features such as ‘Pre-Record’ which will allow you to capture up to 3 seconds of footage prior to pressing the record button so there’s less chance of missing something important. Another useful feature is the Image Stabilisation which is useful in times where you are working without a Tripod but still want to have a smooth looking shot. I usually have it set to ‘off’ to save battery but use the manual button when needed whilst recording from hand.
Storage and zooming...
Digital Zoom is also useful for filming sports as you will quite often be recording action taking place in the far opposite corner to where you are set up with your camera. I have my digital zoom set to x40 on top of the x10 Optical Zoom – because it’s digital, the further you zoom in the more quality you will loose so I try not to go in too far, just enough to still get a good view of what’s going on.
The Legria HFS20 also has two SD Card slots capable of taking two 32GB Cards to expand the storage on top of the built in Hard Drive which is ideal if you are out filming for extended periods. It also has two frame rate options – 50i and PF25. The higher frame rate captures more frames per second and will give a smoother playback when slowed down which can be useful for analysing sports.
There are many camcorders available on the market and you can pick up some great deals online. Even the basic models allow you to capture great footage and combined with good options for editing it is even easier to edit together great sports packages for highlights and training purposes which can, of course, then be uploaded to Coach Logic to analyse in depth and share across your club.
Jonathan Fowke. JPF Sports Media

Written By Jonathan Fowke of JPF Sports Media
Jonathan is a Sports Videographer who has a vast amount of experience. He currently works as the 'Media Man' for the Royal Engineers rugby team but has also worked for Samurai International and London Wasps RFC.


